A Guide to Using Hashnode API 2.0 for Showcasing Blogs on Your Website
🤖 Update: This is an update of my previous blog on integrating Hashnode blogs into your personal website, which was based on Hashnode’s legacy API.
Hashnode will be closing the old API 1.0 in favor of the new GraphQL-based API 2.0.
In this blog, I am going to show how to fetch blogs from Hashnode’s public API 2.0. You can create cards and showcase blogs written by you on your personal portfolio website.
Why Use Hashnode API 2.0?
Hashnode API 1.0, or their legacy API, has been deprecated. Hashnode has released its new API 2.0.
How to Query and Generate JSON Using API 2.0
To query Hashnode’s API 2.0, follow the official API documentation.
In this example, we use React hooks such as useState and useEffect to manage state and fetch data from the API.
Example
Methodology
I am going to use Next.js and query the cover image, title, brief content, and blog URL for my blog (archived)
You can query a maximum of 20 blogs using Hashnode’s new API.
Hashnode allows us to query blog data in JSON format using https://gql.hashnode.com, which supports GraphQL queries. Here is a sample query:
query Publication {
  publication(host: "pratyaywrites.hashnode.dev") {
    posts(first: 20) {
      edges {
        node {
          coverImage {
            url
          }
          title
          brief
          url
        }
      }
    }
  }
}
The output after querying is:
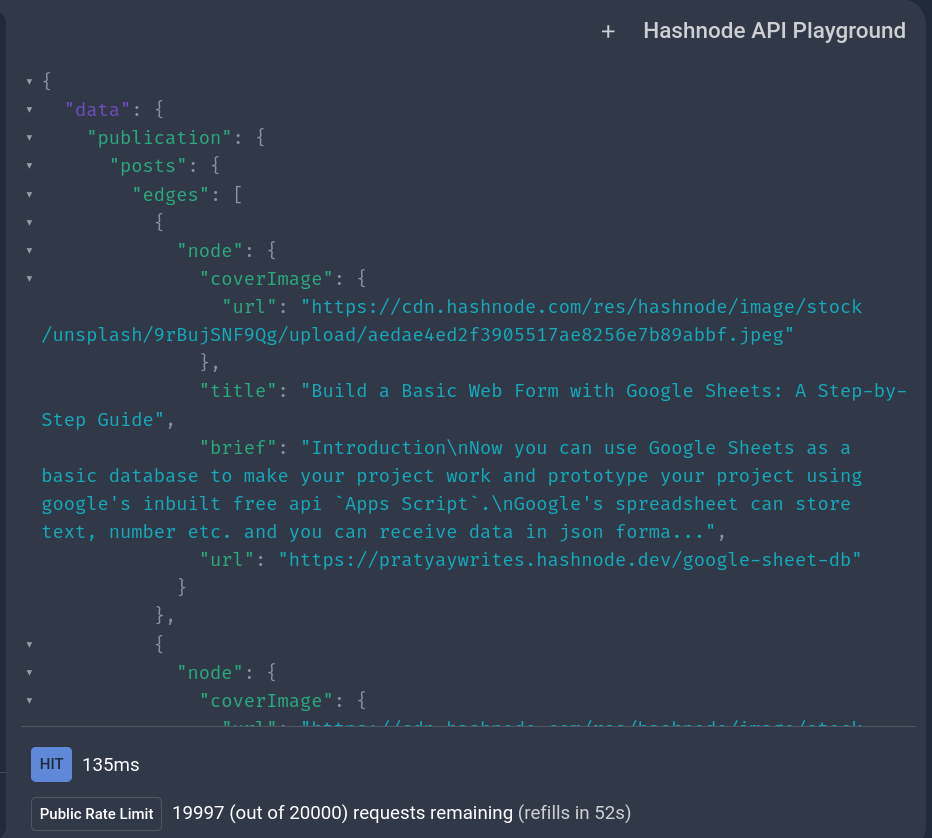
I am now going to use this JSON data on my personal portfolio site: https://pratyay.vercel.app/.
How to Integrate This GraphQL API into Next.js or React.js
I suggest following the same approach as mine:
"use client";

import React, { useEffect, useState } from "react";
import Skeleton, { SkeletonTheme } from "react-loading-skeleton";
import "react-loading-skeleton/dist/skeleton.css";
import Image from "next/image";

type Post = {
  node: {
    coverImage: {
      url: string | null;
    };
    title: string | null;
    brief: string | null;
    url: string | null;
  };
};

export default function Home() {
  // Added the API query schema to get data from Hashnode.
  const [posts, setPosts] = useState<Post[]>([]);
  const [loading, setLoading] = useState(true);

  // Change the host URL to your own publication URL.
  const query = `
    query Publication {
      publication(host: "pratyaywrites.hashnode.dev") {
        posts(first: 10) {
          edges {
            node {
              coverImage {
                url
              }
              title
              brief
              url
            }
          }
        }
      }
    }
  `;

  useEffect(() => {
    fetchPosts();
  }, []);

  const fetchPosts = async () => {
    const response = await fetch("https://gql.hashnode.com", {
      method: "POST",
      headers: {
        "Content-Type": "application/json",
      },
      body: JSON.stringify({ query }),
    });

    const result = await response.json();
    const fetchedPosts = result.data.publication.posts.edges;

    setPosts(fetchedPosts);
    setLoading(false);
  };

  return (
    <SkeletonTheme baseColor="#202020" highlightColor="#444">
      <h1 className="mt-10 p-10 text-center text-3xl font-bold tracking-[20px] text-gray-500 lg:text-4xl">
        Blogs by Pratyay Mitra Mustafi
      </h1>

      {loading && (
        <div className="mt-10 p-10">
          <Skeleton height={500} count={1} />
        </div>
      )}

      <section className="body-font text-gray-300">
        <div className="container mx-auto px-5 py-24">
          <div className="flex flex-wrap justify-center whitespace-break-spaces">
            {posts.map((post, index) => (
              <div className="p-4 md:w-1/3" key={index}>
                <a
                  href={post.node.url || ""}
                  className="block"
                  target="_blank"
                  rel="noreferrer"
                >
                  <div className="h-full overflow-hidden rounded-lg border-2 border-gray-200 border-opacity-60 transition-all hover:scale-110">
                    {post.node.coverImage.url ? (
                      <Image
                        className="h-48 w-full object-cover object-center md:h-36 lg:h-48"
                        src={post.node.coverImage.url}
                        alt={post.node.title || ""}
                        width={350}
                        height={250}
                      />
                    ) : (
                      <Skeleton width={350} height={250} />
                    )}

                    <div className="p-6">
                      <h2 className="title-font mb-3 text-lg font-medium text-gray-300">
                        {post.node.title || ""}
                      </h2>

                      <p className="mb-3 leading-tight text-gray-400 sm:leading-4">
                        {post.node.brief || ""}
                      </p>
                    </div>
                  </div>
                </a>
              </div>
            ))}
          </div>
        </div>
      </section>
    </SkeletonTheme>
  );
}
That’s it. You can now easily display Hashnode data on your website.
You can view the output here.
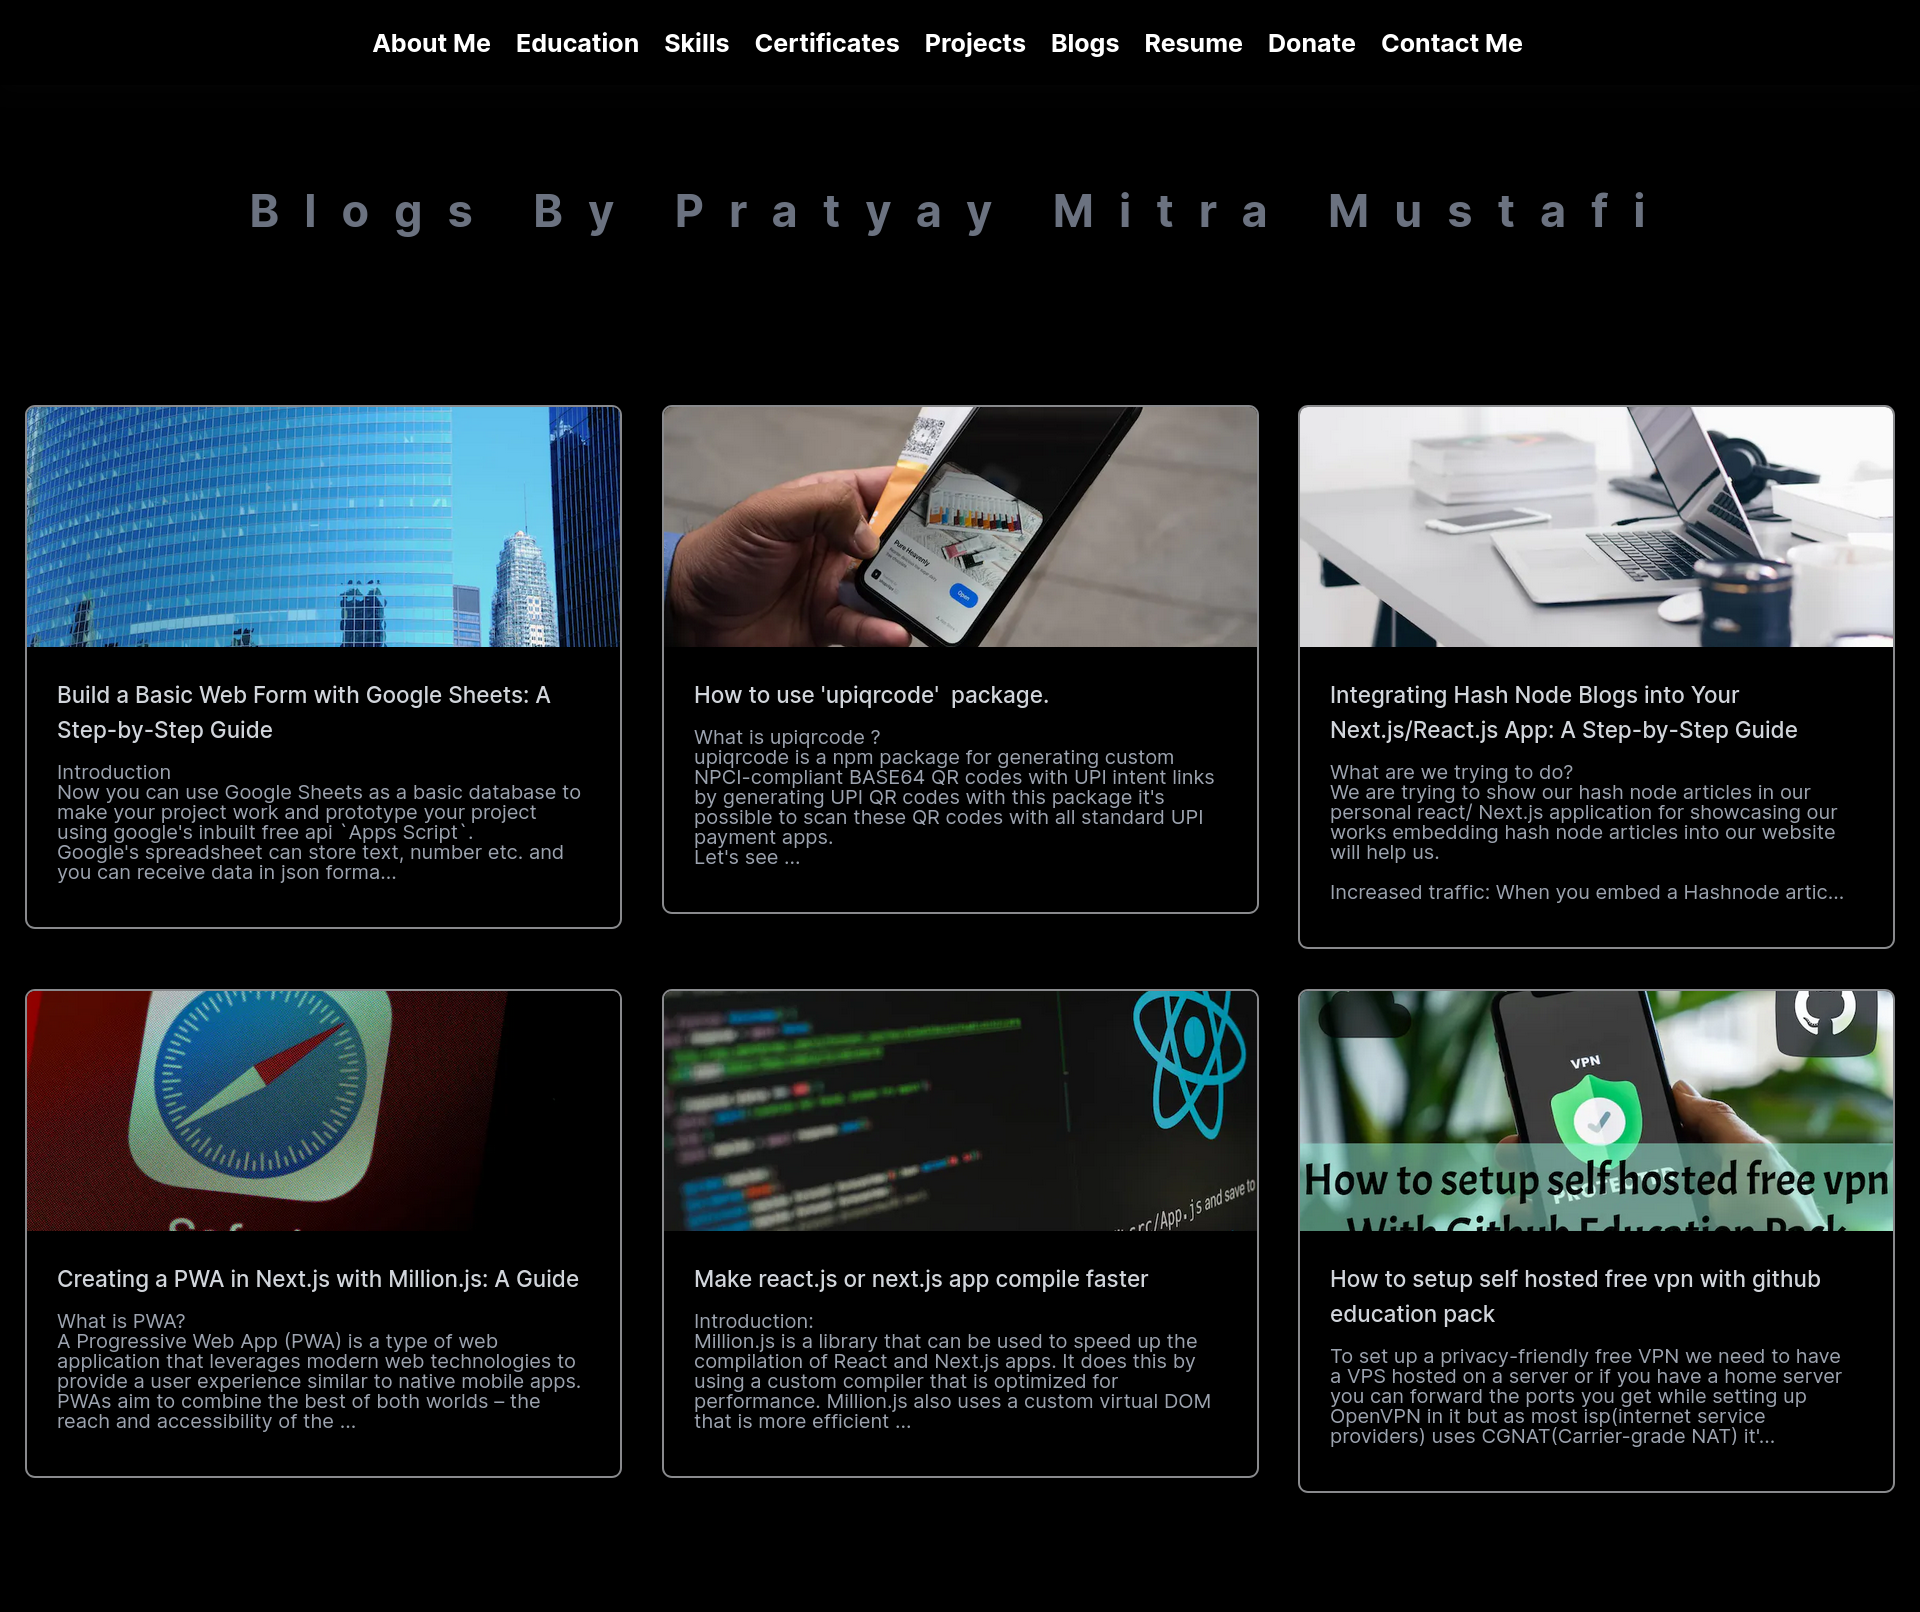
Make sure to follow Hashnode’s official documentation to make changes according to your needs.
Happy coding! 😊